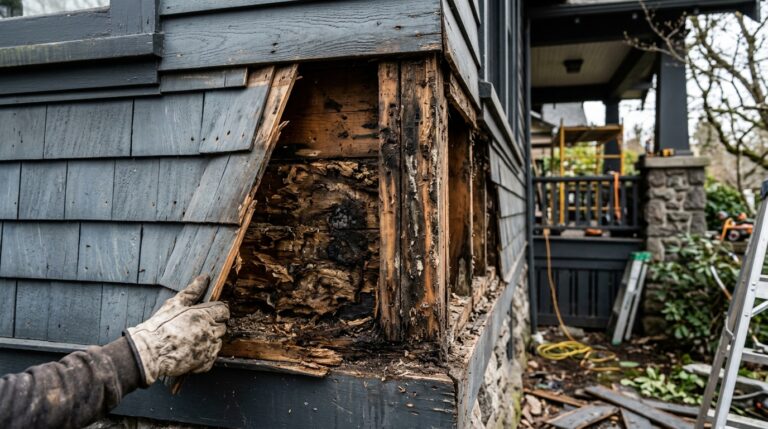


Home improvement can make a property more comfortable, attractive, and practical, but even relatively simple projects can become complicated without a clear plan. Materials need to be selected, furniture may need to be moved, old items must be removed, surfaces often require preparation, and different parts of the project may depend on one another.
A smoother renovation starts before the first tool is used. By defining the goal, creating a realistic budget, preparing the space properly, choosing materials carefully, and understanding which tasks are suitable for DIY work and which may require professional help, homeowners can reduce delays and avoid unnecessary rework.
- Start With the Problem You Want to Solve
- Create a Realistic Scope
- Set a Budget With Some Flexibility
- Clear the Space Before Starting
- Decide What Should Be Kept, Donated, or Removed
- Measure Everything Carefully
- Plan the Order of Work
- Prepare Surfaces Properly
- Think About Durability When Choosing Flooring
- Consider Specialized Floor Coatings Where Appropriate
- Do Not Judge Flooring Only by Appearance
- Order Enough Material
- Test Colors in the Actual Room
- Improve Lighting Before Adding More Decoration
- Think About Storage During Renovation
- Use DIY Resources to Learn the Process
- Know Your Skill Level
- Use the Correct Tools
- Protect Areas That Are Not Being Renovated
- Think About Dust Control
- Do Not Rush Drying or Curing Times
- Check Local Requirements for Major Work
- Prioritize Safety
- Plan for Waste and Disposal
- Inspect Work Before Moving On
- Keep Some Materials for Future Repairs
- Clean the Space Before Final Setup
- Reintroduce Furniture Thoughtfully
- Create a Maintenance Plan for the Finished Space
- Make Improvements That Reduce Future Work
Start With the Problem You Want to Solve
Before choosing paint colors, flooring, fixtures, or decorative details, identify why the project is being considered in the first place.
A room may need more storage, easier maintenance, better lighting, improved durability, or simply a more updated appearance. Defining the underlying problem helps keep later decisions focused.
Create a Realistic Scope
Home projects often expand after work begins. A simple flooring update may reveal damaged trim, outdated paint, or furniture that no longer suits the space.
Decide in advance what the project includes and which improvements can wait. A clear scope prevents every new idea from becoming another immediate expense.
Set a Budget With Some Flexibility
Materials, tools, delivery costs, disposal, and unexpected repairs can all increase the final cost of a renovation.
Create a budget for the main work and keep some flexibility for reasonable surprises. It is generally easier to manage an unexpected expense when the entire budget has not already been committed.
Clear the Space Before Starting
Renovation becomes much easier when the work area is not crowded with furniture, stored belongings, and unnecessary objects.
Homeowners researching clean-out and preparation ideas may encounter resources such as Fairy Clean Out. Clearing unwanted items before renovation can simplify access, reduce accidental damage, and make it easier to understand how much usable space the room actually provides.
Decide What Should Be Kept, Donated, or Removed
A renovation is a useful opportunity to evaluate belongings that have accumulated over time. There is little benefit in moving unwanted items out of a room only to return them after the project is complete.
Sort possessions before work begins so that the finished space does not immediately become cluttered again.
Measure Everything Carefully
Incorrect measurements can create unnecessary expenses when ordering flooring, cabinets, shelving, furniture, or fixtures.
Measure more than once and verify the dimensions required by the manufacturer or installer before purchasing major materials.
Plan the Order of Work
Renovation tasks should happen in a logical sequence. Performing work in the wrong order can result in newly completed surfaces being damaged by later tasks.
For example, messy demolition and repair work generally belongs before final painting, flooring protection, and decorative finishing.
Prepare Surfaces Properly
Many home-improvement failures begin with inadequate preparation. Paint, coatings, flooring materials, and adhesives often perform poorly when surfaces are dirty, damaged, uneven, or unsuitable.
Preparation may take longer than expected, but it can strongly influence the quality and durability of the finished result.
Think About Durability When Choosing Flooring
Flooring affects both the appearance and everyday maintenance of a room. The right material depends on traffic, moisture, expected wear, cleaning requirements, and the way the space is used.
A low-traffic bedroom may have different requirements from a garage, workshop, kitchen, or other demanding area.
Consider Specialized Floor Coatings Where Appropriate
Some spaces benefit from flooring designed to handle more demanding conditions. Garages and utility areas, for example, may require surfaces that can tolerate regular traffic and easier cleaning.
Homeowners researching these options may encounter specialists such as Angelos Epoxy Flooring. When considering epoxy or another specialized coating, evaluate surface preparation requirements, curing conditions, intended use, maintenance, and whether professional installation would provide better results.
Do Not Judge Flooring Only by Appearance
A flooring material may look excellent in photographs while being poorly suited to the room where it will be installed.
Consider moisture resistance, cleaning, comfort, expected lifespan, repairability, and compatibility with the existing subfloor as well as appearance.
Order Enough Material
Flooring, tile, wallpaper, and similar materials often require some extra quantity for cuts, mistakes, pattern matching, or future repairs.
Follow relevant manufacturer or installer guidance when calculating how much material to order instead of purchasing only the exact measured area.
Test Colors in the Actual Room
Paint and finish colors can appear different depending on natural light, artificial lighting, surrounding materials, and time of day.
Testing samples in the real room can prevent disappointment after an entire wall or space has been completed.
Improve Lighting Before Adding More Decoration
Sometimes a room feels dull because of poor lighting rather than a lack of decoration.
Consider natural light, general lighting, task lighting, and accent lighting before filling the room with additional objects.
Think About Storage During Renovation
A beautiful room can quickly become difficult to maintain when there is nowhere practical to store everyday items.
Renovation provides an opportunity to add shelves, cabinets, built-in storage, hooks, or other organization features where appropriate.
Use DIY Resources to Learn the Process
Many homeowners enjoy completing smaller improvements themselves. Painting, basic organization, decorative updates, and certain simple installations may be reasonable DIY projects depending on experience and circumstances.
People researching projects and techniques may encounter resources such as DIY Television. Educational content can help homeowners understand the steps involved, but tutorials should not replace professional expertise for work involving structural changes, major electrical systems, gas, complex plumbing, or other safety-critical tasks.
Know Your Skill Level
A project that looks simple in a short video may require more experience, tools, or preparation than the finished demonstration reveals.
Be realistic about what you can complete safely and to an acceptable standard. Hiring help for one part of a project can sometimes prevent much more expensive repairs later.
Use the Correct Tools
Improvising with the wrong tool can make a job slower, reduce accuracy, and sometimes increase the risk of damage.
Before starting a DIY task, identify the tools required and learn how they should be used safely.
Protect Areas That Are Not Being Renovated
Dust, paint, debris, and tools can damage nearby floors, furniture, and fixtures.
Cover or remove items that need protection and create a clear pathway for materials and debris to move through the home.
Think About Dust Control
Sanding, drilling, demolition, and cutting can create dust that spreads well beyond the room where work is taking place.
Suitable barriers, ventilation where appropriate, cleanup practices, and protective equipment can help reduce unnecessary mess and exposure.
Do Not Rush Drying or Curing Times
Paint, adhesives, sealants, coatings, and other materials often require specific drying or curing periods.
Using the surface too early can damage the finish and create additional repair work. Follow the product manufacturer’s instructions rather than relying entirely on how dry something appears.
Check Local Requirements for Major Work
Larger renovations may involve permits, inspections, building rules, or other local requirements.
Before making structural changes or undertaking significant electrical, plumbing, or similar work, determine what rules apply in the property’s location.
Prioritize Safety
Home improvement can involve ladders, power tools, electricity, chemicals, heavy materials, and other hazards.
Use appropriate protective equipment, follow product and tool instructions, and stop when a task exceeds your experience or can no longer be performed safely.
Plan for Waste and Disposal
Old flooring, packaging, broken materials, furniture, and demolition waste can accumulate quickly.
Decide before the project begins how materials will be removed, recycled, donated, or disposed of according to local requirements.
Inspect Work Before Moving On
It is easier to correct many problems before the next layer or stage of a renovation begins.
Check measurements, alignment, finishes, and completed repairs before installing or painting over them.
Keep Some Materials for Future Repairs
When practical, saving a small amount of matching paint, tile, flooring, or other finish material can make later repairs easier.
Exact colors and product lines may change or become unavailable over time.
Clean the Space Before Final Setup
Construction dust and debris should be removed before furniture, rugs, decorations, and stored items return to the room.
A thorough final cleaning makes it easier to see the finished work and prevents dust from immediately settling onto newly arranged belongings.
Reintroduce Furniture Thoughtfully
Do not automatically return every object to its previous position. Renovation provides an opportunity to reconsider the layout.
Place essential furniture first and add smaller items gradually so the room remains functional rather than crowded.
Create a Maintenance Plan for the Finished Space
Different materials have different cleaning and maintenance requirements. Knowing how to care for new flooring, paint, fixtures, or finishes can help preserve the renovation.
Keep product information or manufacturer instructions available when specialized maintenance is required.
Make Improvements That Reduce Future Work
A successful home project should ideally make the property easier to use and maintain. Durable materials, practical storage, easy-to-clean surfaces, and thoughtful layouts can continue providing value long after the renovation is complete.
By defining the scope, clearing the space, preparing surfaces carefully, selecting appropriate materials, understanding when DIY work is realistic, and completing each stage in the right order, homeowners can avoid many common renovation problems. Good home improvement is not just about changing how a room looks. It is about creating a space that works better after the tools have been put away.